Showing posts with label all fitness level. Show all posts

Thursday, 17 September 2015

Resistance Band Guide

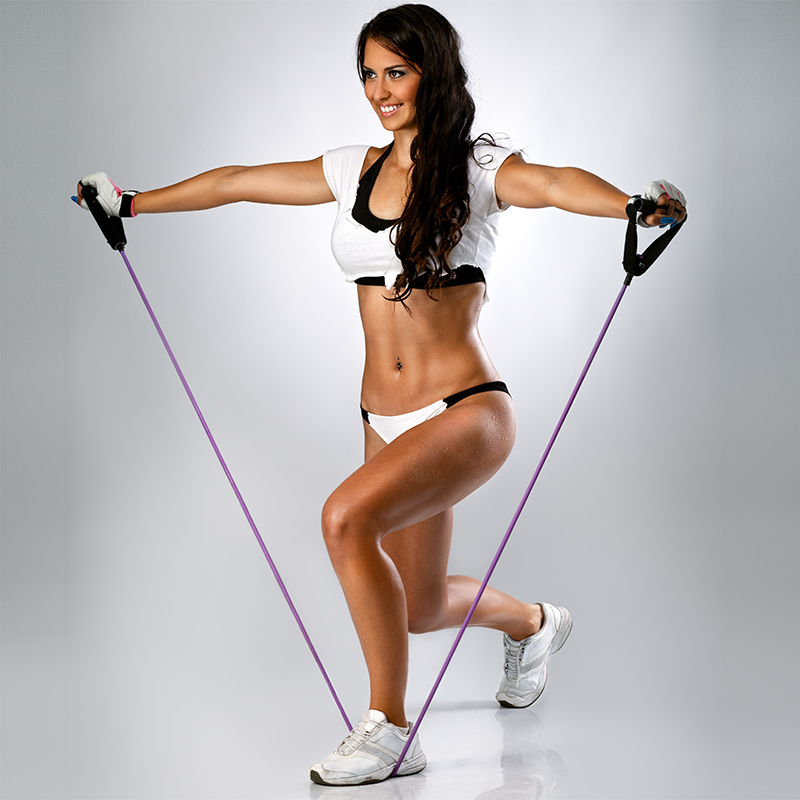
Resistance bands, also called resistance tubing, are an exercise accessory made of rubber. Common exercises can be maximized with resistance bands, as the bands increase the load requirement put on your muscles. Because of their versatility, exercise bands are an appropriate exercise tool for people of all fitness levels. Talk with your doctor before starting a new exercise routine, particularly if you have an existing health condition or injury.

Types

The thicker your resistance band is, the more resistance it will provide. Lighter colors are generally for lighter resistance levels, and as the thickness increases, the colors of tubing get darker. You should use a resistance band that you’re able to stretch, but that is still challenging for you. When stretching your band is no longer demanding, you should advance to the next level of thickness. The varying muscles in your body have different levels of strength, so buy a variety of bands so you’ll be prepared for different exercises. Resistance bands with padded handles are usually more comfortable than non-padded, interchangeable ones.

Usage

Resistance bands are used to gain strength, flexibility and balance. Depending on the exercise, the band can either be fastened to an object such as a door knob, or you can use the band while holding onto the handles. Muscle strengthening exercises such as hamstring curls, bicep curls, squats and reverse crunches are enhanced when a resistance band is incorporated because of the force you exert when attempting to pull the band. You should perform eight to 12 reps of each exercise and two to three sets of each rep.


Benefits

Resistance bands are inexpensive, lightweight and easy to pack into luggage or a gym bag. You can use them with most calisthenic-type exercises, and their versatility will help you concentrate on your targeted muscle groups. For example, if your goal is to strengthen your hamstrings, use your resistance band around both ankles and perform single leg butt kicks while holding on to a secure surface. The resistance from the band will increase the work done by your hamstrings.

Precautions

If a resistance band is joined together at the ends to make one continuous band, the bond where it is joined can be faulty and break, leading to injury while exercising. Choose a band that is a continuous piece of rubber. When performing an exercise that requires the band to be attached to an object, be sure it is fastened securely to avoid slippage. If the rubber on your resistance band shows sign of wear, aging or weather damage, replace it with a new one. If you experience sudden or sever pain while working out with resistance bands, seek medical help immediately.
Source : Susan Presley has been a health care journalist since 2006. Her articles have been published by "Current Health" and the "American Journal of Nursing." With a Bachelor of Arts in communication from Truman State University, she is pursuing a Master of Divinity at Louisville Seminary in Kentucky.


Tuesday, 14 July 2015

Plank Exercise Variations

There is definitely no reason at all not to spice up a standard weight training workout with a few planking postures. Plank training benefits are extensive. When utilizing any planking posture, you'll be strengthening core muscles, that are essential stabilizers for your entire body. You'll very quickly see lumbar issues getting better, coupled with increased abdominal definition. Undoubtedly, the easiest way to increase muscular strength while reducing back conditions and enhancing alignment is plank training. While conventional stomach workouts, like sit-ups and crunches, put stress on the spinal column, plank exercises maintain a straight pose, enhancing posture.
Everybody is able to really benefit from plank routines. Athletes of most sports use planks to develop mid-section strength and durability, probably the most crucial element of pretty much every sport. The military services also supports core muscle training due to their rapid, stomach strength and durability development.
Let's see why you should add planking to your workout routine!

One of the better parts of planking postures is the numerous that may be made from each and every one. As an example, to improve the ab training routine while using the standard plank position, steadily lift up 1 foot off the yoga mat and maintain the posture. The very same approach may be used in types of planking. For additional intense plank exercise routines, consider making use of a chair. Creativity is important because they could be utilized in a plethora of possibilities. Among the more conventional methods of adding a weight bench would be to assume the regular planking pose, and positioning your feet on top of the bench. Yet another popular posture turns around this, and it has the arms on top of a bench.
Lateral planking, as the name indicates, are like standard planking but carried out laterally. Using the lateral plank, the sole parts of the body in contact with the floor include the arm on the side closest the surface, in addition to the feet. This amazing planking activity focuses on the ab muscles along the side of the mid-section, referred to as the oblique muscles. Lateral planking poses are much harder versus classic front side planking position, and definitely will call for a substantial amount of abdominal area power.
The posture of inverted planking is quite simply a standard plank flipped. You should have your backside oriented with the floor together with both arms in contact with the surface. You will need to bear in mind for all planking postures, the sole body parts that are in contact with the surface include the arms, feet and hands. The inverted plank focuses on basically the identical muscle groups as the front side plank exercise.
The question for you is how one can transition this information of a planking workout routine to a health club. Adding planking along with other training is extremely advocated. Despite the fact they may be absolutely advantageous by themselves, planking training is in most cases built into a complete exercise routine. As with every workout routine, the positive outcome of the execution is dependent mainly on the level of fitness of one's participate. With respect to standard and inverted planking, beginning with only thirty second reps is perfectly fine. The wonderful thing about planking is inside of a month or so you will realize quick positive changes on the time period you will be able to maintain for each and every planking posture. For veteran "plankers", a normal front side planking posture is comprised of 2 to 3 minute reps, together with about 5-10 sets or higher. A standard lateral planking posture is made up of 1 or 2 minute reps. This is obviously just a approximate guideline as every person adapts planking postures to fulfill their own particular requirements.
The biggest benefit of a planking workout is the fact that it's free! Zero health and fitness center memberships or complicated equipment are necessary for these activities. The only mandatory tools are spirit, iron will and dedication. Since plank activities don't require related equipment, you can utilize them anywhere. Take a couple of minutes at lunchtime or maybe when you feel exhausted at the job, move down to the ground, perform a couple of plank exercises, and acquire the amazing returns. You will quickly feel recharged and much less worn out than your coworkers who stuffed themselves at break. The number one overwhelming positive regarding plank workouts is how the negative aspects are practically non-existent. A result of the large number of adaptations, virtually all fitness levels can take advantage of plank exercises. They are one of the best calisthenic exercises that is 100% free, uncomplicated and hassle-free.

Source 

Thursday, 2 April 2015

Low Impact Cardio for All Fitness Levels


low impact cardioDeciding to get in shape is a huge commitment both mentally and physically.  You have to change many behaviors that contributed to you being out of shape and unhealthy in the first place.  Everything from the amount and quality of the food that you are accustomed to eating to the lack of exercise or mobility that has become your norm.  The best way to get started is to commit to a low impact cardio and weight regimen to ease your body and mind into this new way of life that will ideally be a complete new lifestyle for good.
Everything from pilates to The Total Hot Body Fitness Workout to dance can get you where you want to go with achieving your fitness goals.

Low Impact Exercises to Get You Going 
The following low impact cardio exercises are great for the beginning enthusiast who isn’t very active. The entire purpose of beginning with low impact cardio is to alleviate pressure on the joints and wake up the body in a sense.  Some things aren’t quite working the way they should have been and/or some muscles haven’t been used in quite a while.  If you do too much too fast, the possibility of injuring yourself increases because of stiff joints and muscles.
Yoga: Some people might not consider yoga to be their first choice when getting back in shape but it is a major cardiovascular exercise with the benefits of stretching out under-used and overly tight muscles, ligaments and joints.
Udemy’s course on yoga provides a very thorough and easy-to-follow instruction on how to perform the most popular and essential yoga poses.  Taken from the course description:
“Yoga is more than just an excellent form of exercise: it is also a spiritual and mental practice that can improve your mental outlook. Anatomy of Fitness: Yoga shows you how to build your strength and flexibility while improving your concentration and willpower.
Featuring a complete yoga program and 64 page manual, this user friendly course includes:
  • A well balanced, flowing sequence of step-by-step poses
  • Comprehensive anatomical illustrations of the muscles used in each pose
  • Clear guidance on the correct form and what to avoid to ensure you’re working effectively and safely
  • Anatomical information and labels to complement the detailed drawings of the body’s muscle system
  • A bonus diary of practice with each pose to record and review your progress
The course also include a range of yoga sequences including Salutation to the Sun, meaning anyone can tailor a program to suit their fitness needs.”
Walking Punches:   In its easiest form this is a very slow and light walking while alternating left and right punches.  As this becomes easier, you can walk faster, incorporate a light jog to increase your coordination, or even march while bringing the knees as high as you can.  This will get your heart rate going just make sure you don’t lose your posture in the process.  Keep your head, neck, shoulders and pelvis aligned and take good inhalations and exhalations.  Later on you can also add small dumbbells to your punches but be careful with that.  Only perform weighted punches if your posture is in check.
Windmill Steps: The beginning level of this exercise is just a simple side step, letting your trailing leg come behind you with a slight tap, as well as adding the large circular arm swing. As you want this to be harder you can drop your hips lower to the ground, adding a squatting position. Increase the step width and speed until you substitute the motion with a lateral jump rather than a step.
Pilates: Udemy offers great instruction in Pilates! This course “offers both the new pilates professional and the pilates student insight into the exercises, why they were created, when the fitness form was invented and how to workout better and smarter so you can be longer stronger and achieve greater success with your fitness goals” (course description).
Static Squat + Punches: Starting with a very shallow squat and a punching motion without any extra weight, only hold your squat for a few seconds before coming up continuing your punches. As you progress stay down longer (until the maximum time), squat lower, and start using dumbbells with your punching motion. Do not, however, speed up your punches, especially if using extra weight. Again, posture is important because you have a lot of body parts moving and aching plus you have your heart  pumping all over the place.
Static Lunge + Curls: Start with a shallow lunge with your feet relatively close together and either very light dumbbells or possibly only arm weight for your bicep curls. As you progress, lunge deeper and with your feet further apart and increase the amount of weight you use with your curl. Do not increase the speed of your curl. As you go down in the lunge, your biceps curl with your elbows tucked close to your body. Then the curl opens back up as you come to standing position.
Static Lunge + Tricep Extension: With this lunge position only the front leg is bent and the rear leg is extended straight. Start with a shallow lunge and little to no weight in your hands. When you want more of a challenge, increase the depth of the lunge and the distance between your feet as well as the amount of weight you are using for your tricep extension. Do not increase the speed of your tricep extensions.
 Fingertip to Toe Jacks: Start with a slow leg lift reaching to your toes each time then increase the height of the leg lift as well as the speed of the leg until you are actually hopping back and forth from leg to leg with only one foot on the ground at a time and moments when both feet are off the ground. At this pace you will need to alternate one hand going up while the other is coming down.
Stutter Step: The easiest version of this exercise is still hard but start with all of your weight in one leg with only a slight bend (or even keep it straight), placing the opposite leg back only a few inches behind you and driving the knee up in front of you slowly as you bring your hands down. Increase the depth of your squat on the supporting leg while extending the moving leg further and further behind you. At the same time, start increasing the speed of which you move your arms and leg.


Just Get Started!
Whether you are a newbie to the exercise world, a seasoned professional who’s taken a long hiatus, an injured athlete coming back to exercise life slowly, or perhaps an elderly person looking to modify certain exercises to accommodate certain areas of the body that need more care, the variety of  low impact cardio exercises are endless.
A key marker with any fitness regimen is to just get started.  Working out too hard too fast is not the way to go for most folks and better to slowly work your way up than go hard, get injured, and then have to spend weeks recuperating with limited mobility.

Source 

Sunday, 15 March 2015

4 Leg and Booty Exercises for Any Fitness Level

As a trainer, part of my job is to take foundation movements (such as squats and lunges) and find ways to progress them for any fitness level.
Below are some of my favourite exercises I use with my clients – regardless of what level they’re working at. You can choose to do these with or without weights.
What You Need:
The Breakdown:
  • Perform exercise #1 and #2 with no rest between (This is a superset!)
  • Repeat for 3-4 sets with 60-90secs rest between sets
  • Superset exercises #3 and #4
  • Repeat for 3-4 sets with 60-90secs rest between sets

1. Seated Squat – 15 reps 
Begin standing in front of the steps with your feet slightly wider than hip width distance apart, toes angled slightly out. Place your hands behind your head (feel free to use a weighted bar or do a "goblet" style squat with a free weight)
Begin standing in front of the steps with your feet slightly wider than hip width distance apart, toes angled slightly out. Place your hands behind your head (feel free to use a weighted bar or do a “goblet” style squat with a free weight)
Keeping your heels on the ground, sit back and down in to a low squat squat until you're seated on the steps. Don't drop! Make sure you squeeze your glutes and use control.
Keeping your heels on the ground, sit back and down in to a low squat squat until you’re seated on the steps. Don’t drop! Make sure you squeeze your glutes and use control. Press through your heels and return to standing.

2.Step Ups – 15 per leg (One leg at a time then switch!)
Begin with one foot on the steps, hands on your hips. (If you choose to use free wights, hold them at your sides)
Begin with one foot on the step, hands on your hips. (If you choose to use free weights, hold them at your sides)
Squeeze your butt and step up on to the platform. Don't launch off your back foot! The only leg that should be working is the one on the step!
Squeeze your butt and step up on to the platform. Don’t launch off your back foot – the only leg that should be working is the one on the step!
Squeeze your tush and lower WITH CONTROL back to your starting position.
Squeeze your tush and lower WITH CONTROL back to your starting position. The goal is trying to keep your knee from wobbling both on the way up and down.
3. Split Squats – 15 per leg (one leg at a time then switch!)
Begin with one foot rooted on the steps and the other in front of you (think of this as a lunge prep with your back leg lifted) Place your hands on your hips. If you're using weights - you can have the hiit bar on your shoulders or hold two free weights at your sides.  TIP: This move requires a decent amount of flexibility. Don't be afraid to lower the  steps for your back leg.
Begin with one foot rooted on the steps and the other in front of you (think of this as a lunge prep with your back leg lifted) Place your hands on your hips. If you’re using weights – you can have the hiit bar on your shoulders or hold two free weights at your sides.
TIP: This move requires a decent amount of flexibility. Don’t be afraid to lower the steps for your back leg.
Bend both knees and drop as low as you can, keeping your front heel on the ground.
Root through your front heel, squeeze your butt and press back to your starting position.

4. Box Jumps – 15 reps
Begin in a low squat, steps in front of you
Jump off of both feet
Land with both feet in a squat. Jump off with both feet and repeat. TIP: Feel free to adjust the height of the step to whatever feels most comfortable - especially if you have knee or joint issues!
Land with both feet in a squat on the steps. Jump off  back to the ground with both feet and repeat. TIP: Feel free to adjust the height of the step to whatever feels most comfortable – especially if you have knee or joint issues – even a little tiny hop up is good until you get stronger!

Try this workout a couple times a week, adding the progression of weights as you get stronger. You won’t believe how quickly you build more strength in your lower body!

Article and photo Source: