Showing posts with label exercise for beginners. Show all posts

Thursday, 13 August 2015

Crossfit Workouts For Beginners


Here I'm gonna talk about some Crossfit workouts for beginners. Beginners at Crossfit may find all this talk about the "Workout Of The Day", sumo deadlifts and kettlebell swings a little confusing if they haven't heard of them before.
The Crossfit workouts are basically like this: Each day, a workout is prescribed by the trainer, called "Workout of the day", or WOD. Every person at the Crossfit gym performs this same workout, the goal is usually to finish the workout in as short a time as possible or do as many reps or rounds as possible.
You don't need to worry if you're a beginner and think you can't handle a Crossfit workout, because the workout is scalable to pretty much any fitness level. The trainer can help you find an easier variation of every exercise that is performed.
Most of the exercises are easy to perform, it's the speed and lack of rest in between sets that is most challenging. If you've been in the gym a lot and are able to put up respective numbers, you may still find yourself drained in a matter of minutes of doing a Crossfit workout, that's how I felt in the beginning.
If you're still afraid of dipping right into a Crossfit workout, then here are some Crossfit workouts for beginners that you can practice with:

1. Squats. Any variation of squats will do. Doing them with no weight in the living room of your house will give you plenty of practice. Just make sure to watch your form. There are also plenty of variations that you will learn at Crossfit.

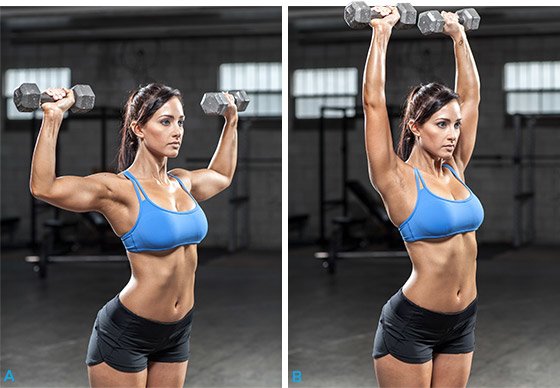
2. Shoulder Presses. If you have a barbell, or dumbbells, then you can practice doing shoulder presses in order to gain a bit of strength before trying Crossfit.
3. Crunches. Any form of crunches will do, since they all do pretty much the same thing. Planks are also excellent to strengthen your core.

4. Push ups. Regular push ups will do just fine, but if you want to get a bit of preparation for the speed of Crossfit workouts then you may want to try the clapping push ups. They are pretty much the same, except that you push much faster and then clap your hands once in between reps. Warning: you might fall on your face, that's what happened to me once when I tried clapping my hands two times.

And finally, I would recommend trying to get into good cardiovascular shape, preferably doing high-intensity, anaerobic cardio exercises since these are a major part of Crossfit.
So these are a few Crossfit workouts for beginners that you can practice with, but like I said before I don't think you need to worry about anything since the exercises are scalable so you can just show up at a Crossfit workout and start.

Friday, 7 August 2015

3 Easy Full-Body Exercises, 1 Piece of Equipment

If you are looking for one very efficient piece of exercise, look no further than the kettlebell. Kettlebell workouts are famous for burning fat by increasing lean muscle while building balance and grace. Plus it is an amazing stress-reliever that relieves tension in both the muscles and the mind. The exercises are simple, yet effective.
When used correctly, kettleballs are wonderful conditioning tools. They can be used for various purposes such as:
  • Cardiovascular conditioning
  • Fat loss
  • Strength and stamina
  • Muscular endurance, especially the legs, buttocks and lower back
Choosing the Correctly Sized Kettlebell
When first starting out, choosing the correct size kettlebell to train with is very important. You need to pick a weight that is easy enough to handle but heavy enough to make you use your hips explosively to drive the kettlebell in to its correct position, depending upon the exercise that you are doing.
Most ladies would normally start with either a 5-10 pound kettlebell, while men would normally start with a 15-20 pound kettlebell. The size depends on the condition of the person exercising, so don't be afraid to drop down a size to keep proper form. Initially, more repetitions are better than more weight.

Kettlebell Basic Exercises
Before you can start on a basic routine, you must first master the three basic exercises with the kettlebell. These are:
  1. The Swing
  2. The Clean
  3. The Snatch
1. The Swing
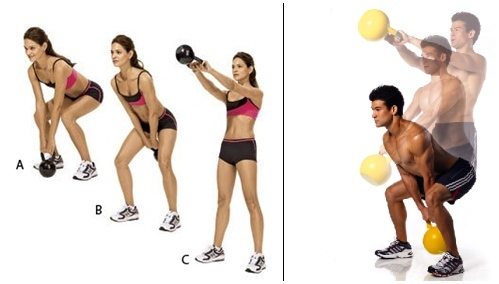
This is a simple exercise, but extremely effective using the whole body. Standing with your feet slightly more than shoulder width apart, hold a kettlebell with knees bent. Grip the kettlebell with both hands and lift to groin height. Ensure that your back is arched and that your head is upright. Keep the weight on your heels, bending at the knees, back straight and head looking up and forwards (as if you are going to sit down in a chair). Swing the kettlebell to the rear backwards, between the legs. The weight should remain on your heels and the shins should be vertical.
It is essential that you perfect this movement because without it, you will never have the leverage to get your hips into the movement. You should feel the kettlebell pulling you backwards and your hamstrings contracting. Pushing through your feet and legs, quickly snap/thrust the hips forward tightening the glutes and abs (This motion is similar to jumping up vertically.) Do this quick snap of the hips motion while at the same time projecting the kettlebell forwards and away from the body. Keep the arms relatively straight and bring the kettlebell to waist, chest or head height, then allow the kettlebell to freely return to the start position and repeat.


2. The Clean
Hold the kettlebell in one hand. Swing it through the legs, bring it forward, and push up through the legs from the feet. As the kettlebell comes over the top of your hand to hit your forearm, grip the handle tight and also dip at the knees. This will assist you in absorbing the impact of the kettlebell. The kettlebell should lie on the forearm with your elbow tucked into the side. The wrist should be flat, and your palm should be facing inwards towards the body.
The Swing will test your stamina, grip, and body coordination. The entire exercise can be carried out using one hand, switching at the top or bottom of the drill. It is important to keep core muscles tight to control the kettlebell at all times.

3. The 'One-Arm' Snatch
Swing the kettlebell back through the legs as you push through the feet and legs. Bring it up, snapping at the hips, sucking the floor up with your glutes. At this point, the body should be locked; the power of your drill should now have the kettlebell well on its way up. Remember: as the kettlebell comes over, dip at the knees and grip the handle to slow the kettlebell and avoid the impact on the forearm. The entire body should be locked with total tension that includes a strong core. 

Kettlebells can make a huge difference in your strength, core, muscle tone and stamina. The exercises are simple but effective. Losing weight is an added bonus! Enjoy!

Source  Sherry L. Granader is a Sports Nutritionist, National Speaker and Spokesperson, Author of 2 healthy cookbooks, Writer, Ghost Writer, Nationally Certified Fitness Instructor and Personal Trainer.

Thursday, 2 July 2015

Yoga for Flexibility: The Beginners Guide to Eliminating Stiffness


yoga for flexibilityYou’re 25. Not 90. But your body feels like it’s lived through war, more than one Great Depression, decades of hard work and – you’re tired of it. Thankfully, yoga can help alleviate some of your tense muscles, stiff joints and the general misery that you’ve been carrying around with you. Take a few minutes out each day to treat yourself to a nice stretch and all your old and achy parts will thank you later. Plus, maybe, one day you’ll be able to touch your toes. Finally. The honest yoga for beginners. (I got you.) Here is a beginner’s guide to use yoga for flexibility.
A few pointers to follow before you get started:
1. Don’t overdo it. Yeah, it feels good, you’ve got it, but really – don’t overdo it. These poses are aimed at improving flexibility which involves a lot of stretching and sometimes you can over stretch and that causes broken things. Don’t break things. If you do, repair them with neck and back care through yoga.
2. Don’t try to do the absolute most complicated yoga pose because you want to show off or see if you can do it. Chances are you’ll end up hurting yourself or want to hurt others.
3. Call the yoga poses by their awkward animal yoga names. You’ll butcher it if you try to call it by its “proper” name and your friends and yoga peers won’t know what  you’re talking about. Downward facing dog is much more acceptable.
4. Stick with it. If you don’t practice yoga on the regular, those few days of being super flexible won’t last and you’ll be back at square one. Make it a part of your routine, two or three times a week.

Why are you not flexible?

Maybe because you sit in a chair that feels like asphalt all day with your hands on a button board. Or maybe it’s because you stand all day on a floor that feels like (or is) asphalt and you don’t get a break. It could be age, it could be genetics, it could be your diet and it most certainly could be because you don’t do anything to challenge the inflexibility from creeping up on you. Time for change. And just think, if you start doing flexibility exercises on the regular it could improve your circulation too, which means no more unacceptably cold feet.
Okay, yogi. Time to begin.

1.  Bound Angle Pose/Seated Pose (baddha konasana)

Bound Angle Pose/Seated PoseIt sounds more dangerous than it is. Really, this is just a more complicated (not really) version of sitting on the floor with your feet together. If you can’t quite get your feet together – it’s okay. Give yourself a week or two and you’ll have no problem. If you can get them together, start working them towards your body to increase the stretch. This will stretch your hips, lower back, outer and inner thighs. Man, does it feel good.
How:
1. Sit on the floor. (Nailed it.)
2. Fold one of your legs in so your foot is facing the inside of your extended leg.
3. Bring your other foot in and put the soles of your feet together.
4. If you aren’t feeling a stretch yet, pull your feet closer to you with one hand, don’t let your butt slide back – that defeats the purpose. Now push down on your feet. This will make you lean forward a bit. The closer your feet are to you the more stretch your inner thighs will get (this is what makes it the bound angle), the further away your feet are, the more the outside of your thighs stretch (this is called the seated pose).
5. Stretch. Stretch as long as you want to. Breathe deeply and think about how awesome you are. When you’re done, check out Yin Yoga for even more yoga inside tips.

2. Low Lunge (Ashwa Sanchalanasana)

Low LungeIt’s like you’re proposing but you forget to bring one leg with you. This pose stretches the hips and psoas (long muscles along your back and into your pelvis). It feels really good but if you stay here too long, you might get stuck. Or at least I have, guess I get too into the back arch part for which my lower back is unforgiving.
How:
1. Stand in Mountain pose (straight with feet together and hands at your sides)
2. Step your right foot backwards far enough that your left leg comes to a 90 degree angle to the ground. Make sure your left foot is planted firmly on the ground and that your right leg is extended fully and you are pushing towards the matt with your knee.
3. Place your hands on your knee and push down towards the mat with your pelvis.
4. Hold for 6-8 breaths and come back to Mountain pose.

3. Childs Pose (Balsana)

Childs PoseIt’s as simple as it sounds. Stretch out your lower back and gain some more flexibility in your hips with this fool-proof pose. Seriously, it’s so easy. This is a very basic pose in yoga so learn it, remember it and use it often.
How:
1. Kneel on your mat with your legs together.
2. Bend over at your waist and rest your stomach on your thighs, put your forehead on the floor.
3. You can either: put your hands out in front of you to elongate your spine and maximize the stretch or, you can relax and put your arms, palm up, on either side of you. You choose.
4. Hold the pose as long as you want. Try not to fall asleep. Breathe deeply.

4. Bow Pose (Dhanurasana)

Bow PoseYeah, this one looks a little weird but I promise when your body is mangled in that position you are going to have one awesome stretch. Doing this pose frequently is going to increase the flexibility of your legs, back and arms. I guess it’s an all-over body pleaser (although you may be sore after trying this the first or fifth time – stick it out).
How:
1. Lay down on your stomach on your mat.
2. Bend your right leg at the knee and bring it towards your butt.
3. At the same time, lift your torso up slightly off the floor and reach behind you with your right arm to grab the ankle of your bent right leg.
4. Hold this pose for five deep breaths.
5. If you don’t feel the stretch yet you can pull your leg a bit closer to you and arch your back a bit more. If you’re really feeling ambitious, and want to be like that woman in the picture, bend both legs at the knee and grab both ankles with the respective arms.

5. Cobra Pose (Bhujangasana)

Cobra PoseNot only is this a good flexibility builder, it’ll relieve any lower back pain you may have. Things like sciatica can be almost unbearable and this pose takes the pressure off and gives you a moment of peace… as long as your arms don’t give out.
How:
1. Lie down on your stomach on the mat.
2. Make sure your feet are sole up and pushing into the mat.
3. Bend your arms and put them on either side of you. Push the palms of your hand into the ground.
4. Raise yourself up and arch your back to a comfortable level. Push your pelvis into the floor and tilt your head up to look towards the sky. Push your chest out and hold the pose for seven deep breaths.

Tuesday, 28 April 2015

Women's Fitness - 7 Tips To Gain A Fit Body

A beautiful body is what women long for. No matter whether it is Hollywood or anywhere else, this has always remained a trend. But there are many right ways of exercising programs for women who are looking for effective losing of fat.

Strength training is one growing and most effective form of exercise among women. Besides fat loss, it also assists in several other benefits. This includes increase in bone density with restoration, metabolic density, mass increase and lean muscles, improved balance, injury prevention, recovery and rehabilitation, coronary disease prevention, delayed aging process, sports performance improvement along with figure and look enhancement.

Always consult your doctor before you begin with any strength training program. This would ensure you with proper fitness along with required safety. Planning out routines for your fitness program is factually the trickiest of all among anything else. However, if you make sure to follow the fitness guidelines provided by your instructor, then you could undoubtedly increase the chances of being successful in your fitness routine.
 
 
1. Always know that muscle can never be strength trained within a day. A minimum of at least 24 to 36 hour allocation needs to be followed. Muscle injury, fatigue and over training can take place if exercising is done on consecutive days.

2. Instant weight loss in never possible. For an instance excess stomach fat cannot be lost overnight, simply by doing 100 crunches at a stretch. Tummy flab cannot disappear with such ease. Total reduction of fat in your body should be done initially by good rest, eating well and of course proper exercise.

3. Toning the body cannot be done at an instance. A step wise procedure needs to be followed. Always concentrate on a single muscle group. As you get through with that you can proceed towards your next target. You can also consider using machines than simply using weights freely.

4. Strength training programs need to be regular and consistent for ensuring successful results. Make it a point to know that the weight you have gained was a many-years process and hence losing the same could take time too. You need a change in your lifestyle while you are in strength training. Replacing good habits with bad ones is mandatory.
 
 5. Every 4-6 weeks changes are required in strength training. This would essentially prevent the body from getting bored and also make work outs very interesting. Changes in intensity levels and methods of exercise are very essential. Constant routines at times stop to produce the desired results. It is implied to grow from the everyday workout.

6. Specific objectives are a must so that the strength training programs are created accordingly. It could include adding bulk, hypertrophy, maintaining weight or even fat loss. Optimal results would vary based on your desired objective. There would be wide variation if you are choosing to lose body fat, when compared to increasing bulk in the muscles. Keep the right goals to structure the best fitness strength training program.

7. Any regular routine must work out all the major muscles at least one to 3 times in a week. This would include chest, shoulders, triceps, biceps, calves, quads, abs, gluts and hamstring. It would create an imbalance if any one among the muscle group is missed out.
A decent effective strength training program could be built among women who follow the right guidelines in a dedicated manner. It is always safe to have a safe and healthy body. Always be ready to get that exquisite shape you always wondered about.

Source Abhishek_Agarwal

Tuesday, 20 January 2015

4 Lower-body Movements for Beginners

If you’re just getting started with a fitness routine, it can be a challenge to know how to properly perform exercises for the various muscles of the body. Here are four introductory lower-body movements for beginners, with advanced options that can be done once you’ve mastered the basic exercises.

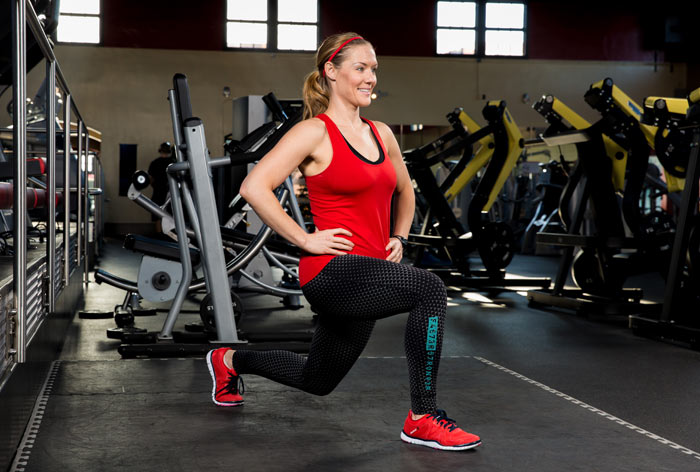
Static-stance Lunge
static stance lunge

Stand with your feet together, shoulders pulled down and away from the ears, and your core engaged. Step forward with one foot and find your balance. Your feet should be far enough apart so that when you go down into the lunge position, your knee is facing directly forward and not going over your toe. If you don’t have enough balance for this exercise, stand by a wall or hold on to a stable chair. Keep your torso erect by continuing to engage your core (don’t lean forward). Drive your hips toward the floor, controlling the movement until your thighs become parallel with the floor. Push with the front leg to come back to the top of the lunge and repeat.
Advanced: Perform an alternating plyometric lunge. After doing one lunge, add a hop before moving into the next one, switching the lead leg each time.

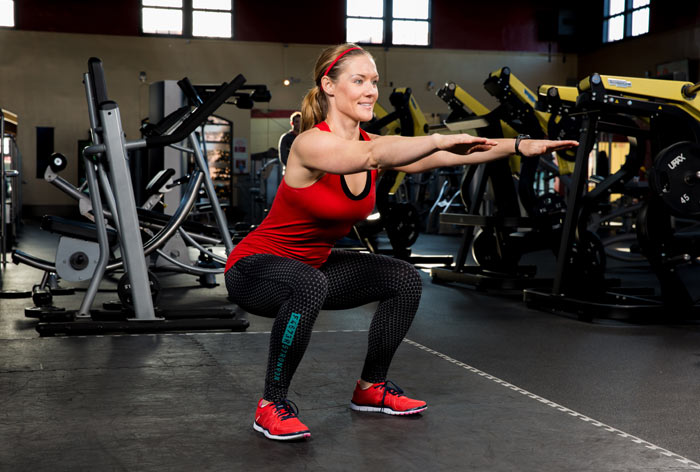
Squat
squat

Stand with your feet a little wider than hip-distance apart and toes pointed slightly outward. Engage the core and lift the chest. Look straight ahead and keep your hands by your sides. Shift your weight back into your heels and push your hips behind you until your thighs become parallel with the floor. Your knees should be moving in the direction of your toes. Do not let your torso become rounded or let your heels come off of the floor during the movement. Lift your hips, torso and chest simultaneously as you return to the starting position.
Advanced: Perform a squat; extend first the right and then the left leg out to the side at the base of the squat. Bring the foot back toward the center and stand back up to the starting position.

Balance
Balance

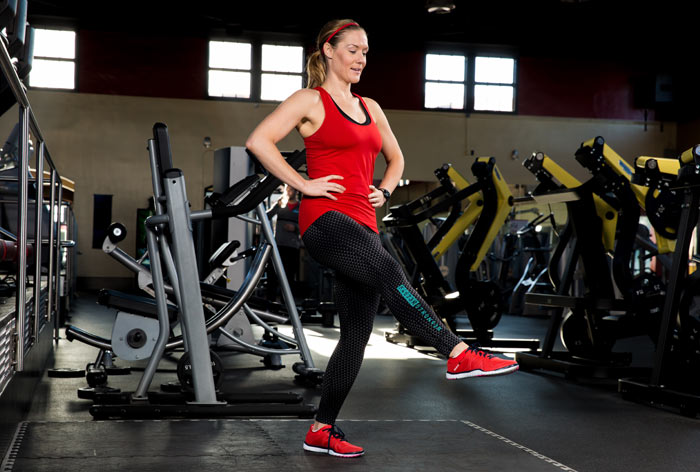
Stand on one leg; use a chair or stand by a wall for support, if needed. Lift one leg off the ground and write the alphabet in the air with your toe; repeat with the opposite leg. This can be a great exercise to do while standing in the kitchen cooking or while folding laundry.
Advanced: Stand on one leg and extend your arms straight out from your body. Rotate your arms so that your right arm is pointing toward your toes and your left arm is extended to the ceiling. Next, switch so that the left arm is pointed toward the ground and the right arm is extended toward the ceiling.

Lateral Lunge
Lateral lunge

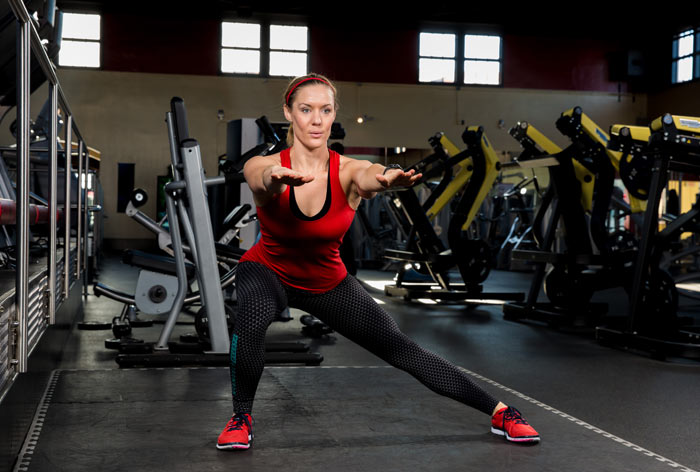
Stand with your feet parallel, hip-width apart. Look straight ahead and keep your hands in a comfortable position to help you maintain your balance during the exercise.
Inhale and slowly step to the right while keeping your weight in your left heel; keep both feet facing forward. Once your right foot is firmly placed on the floor, begin to shift your weight toward the right foot, bending the right knee and pushing the hips back. Continue to lunge until your shinbone is vertical to the floor and your right knee is aligned with the second toe of your right foot. Your left leg should be as straight as possible and your body weight should be distributed into the right hip. Keep the heels of both feet flat on the floor.
Advanced: Perform a lateral lunge as described above, but after the lunge, bring the knee up and place a small ball or med ball underneath the leg and then return to the lateral lunge.

Source